Here we have 10 simple steps to be followed for printing QR Codes(which can be used to accept payments via UPI) on the sales bill/invoice in the innoventry software:
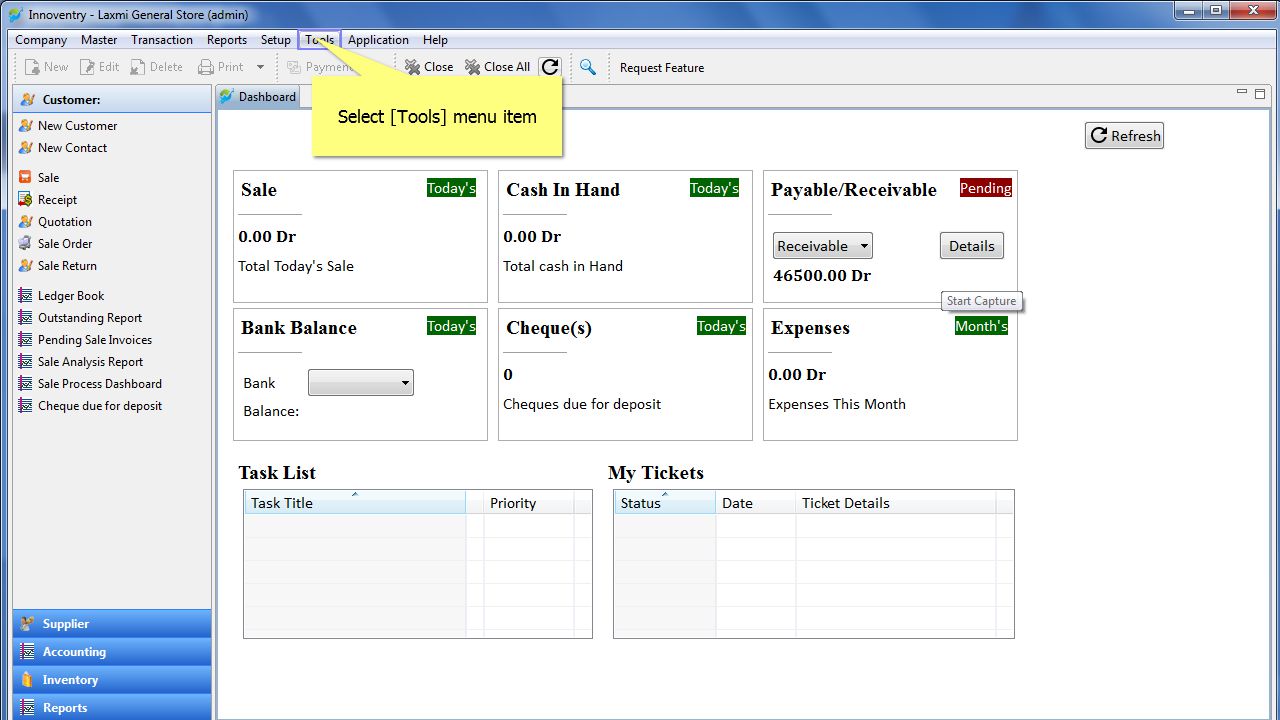
Step1: Click on the “Tools Menu” in the menu bar.
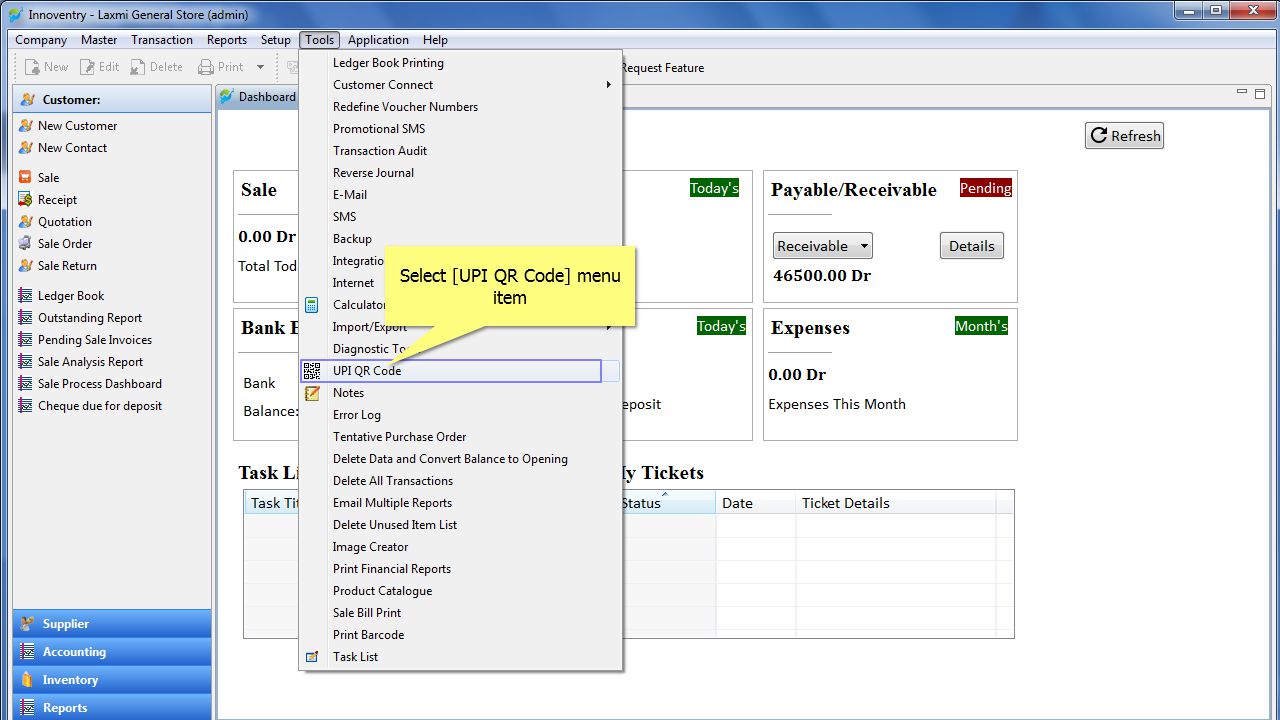
Step 2: Select “UPI QR Code” option from the drop down menu.
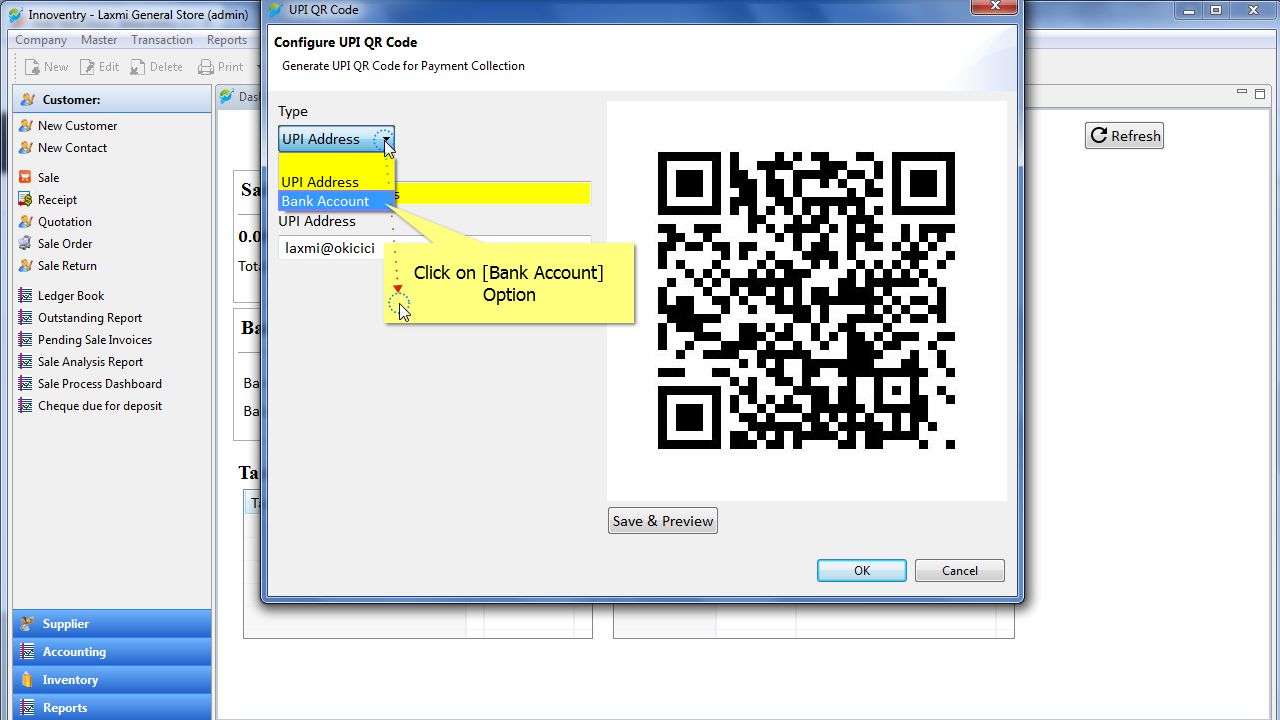
Step 3: A dialog box “UPI QR Code” opens. Here we have choice to select between two options:
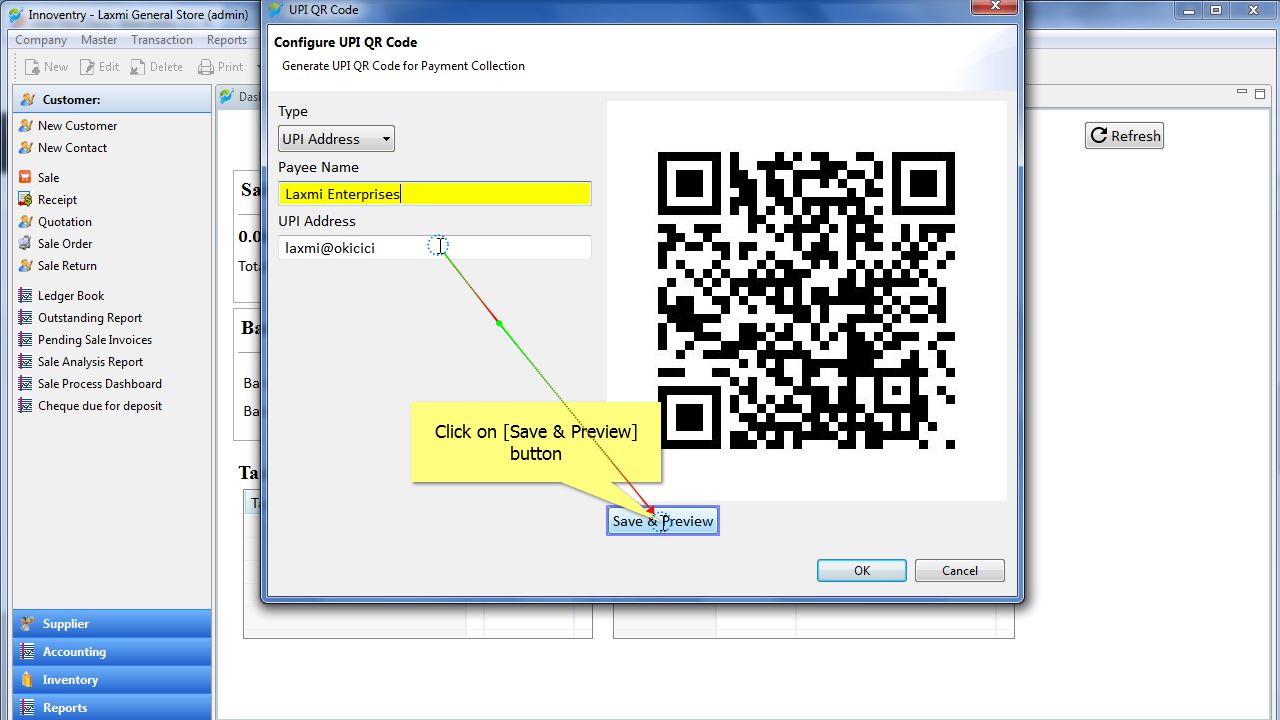
Option A: i) UPI Address (used when we already have a UPI address available)
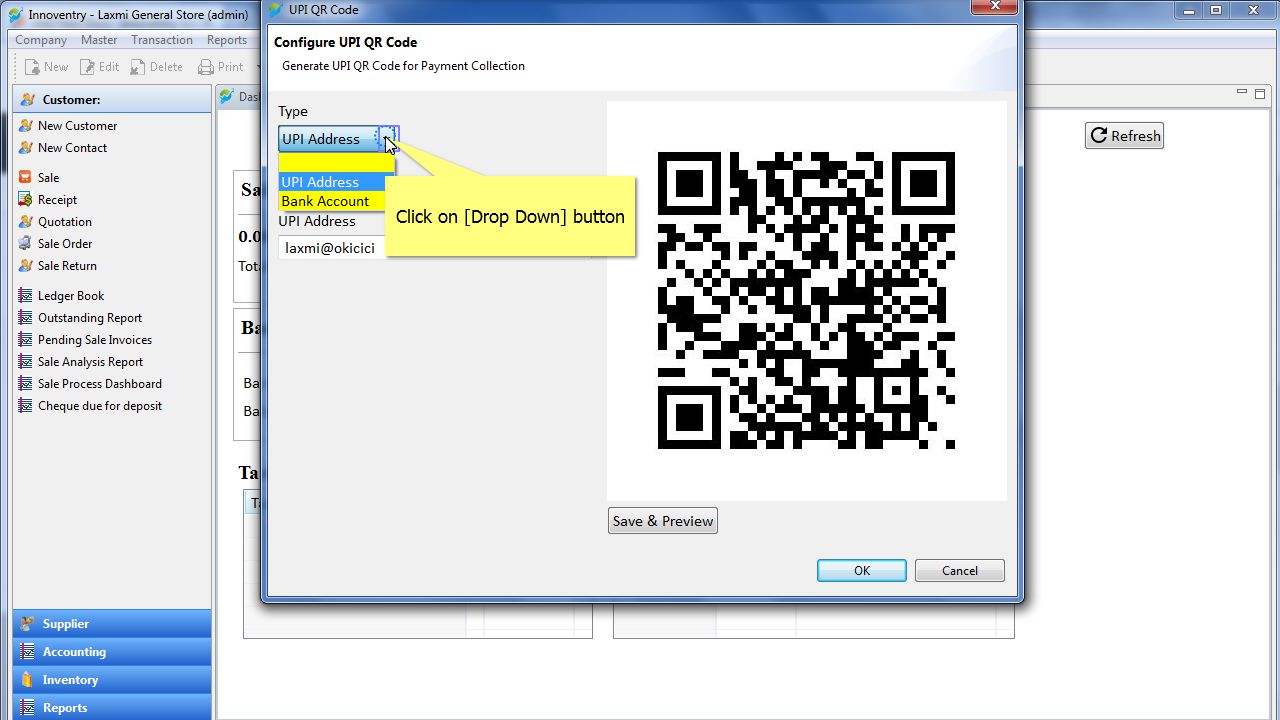
ii) Insert “Payee Name” and “UPI Address”.

iii) Click on “Save&Preview” Button to generate the QR Code
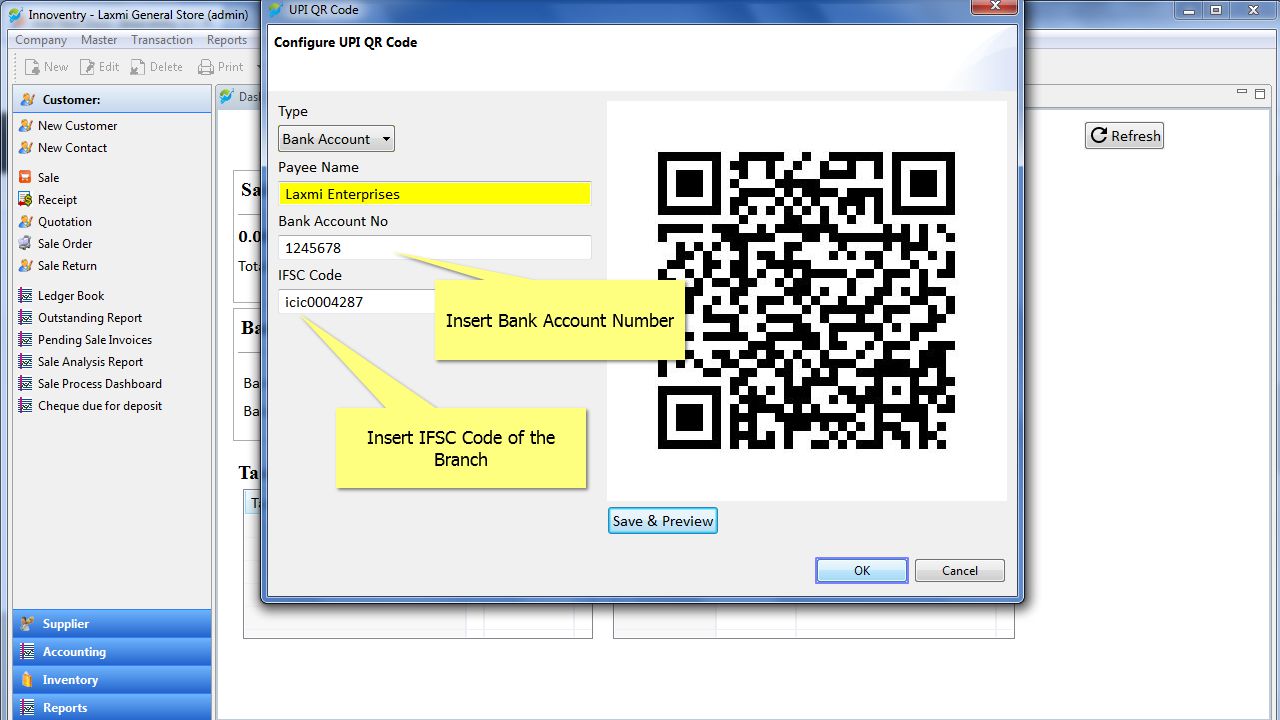
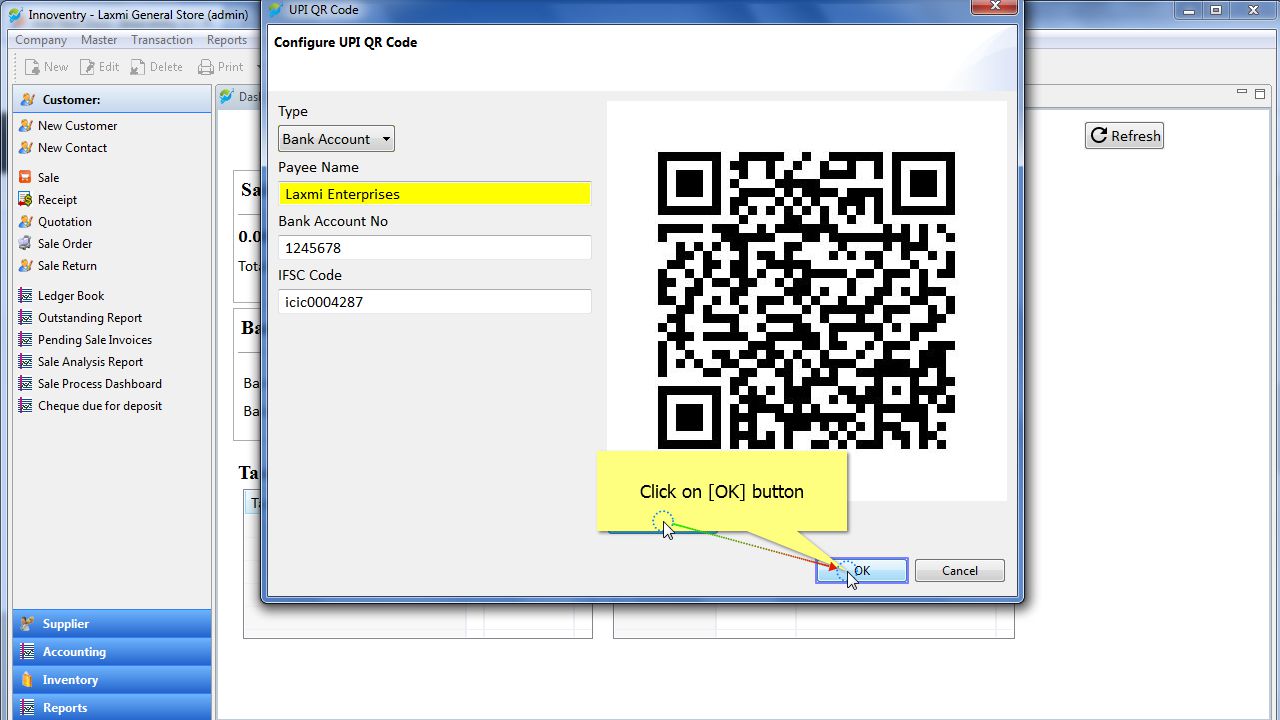
Option B: i) Bank Account Option : Select the “Bank Account” option if UPI Address is not available. Bank account number and IFSC code can be used to generate the QR Code.
ii) Insert “Bank Account Number” and “IFSC Code”.
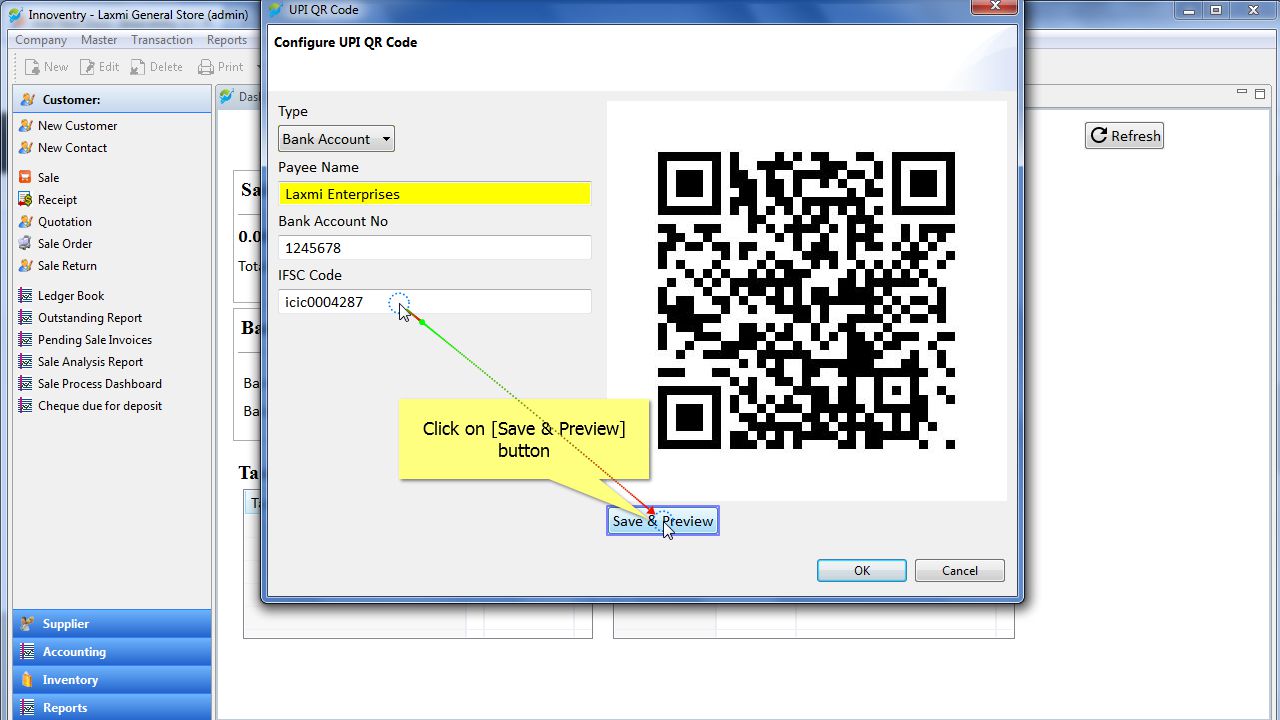
iii) Click on “Save&Preview Button” to save the QR Code.
Step 4: Finally click on the “OK” button and the QR code will be generated.
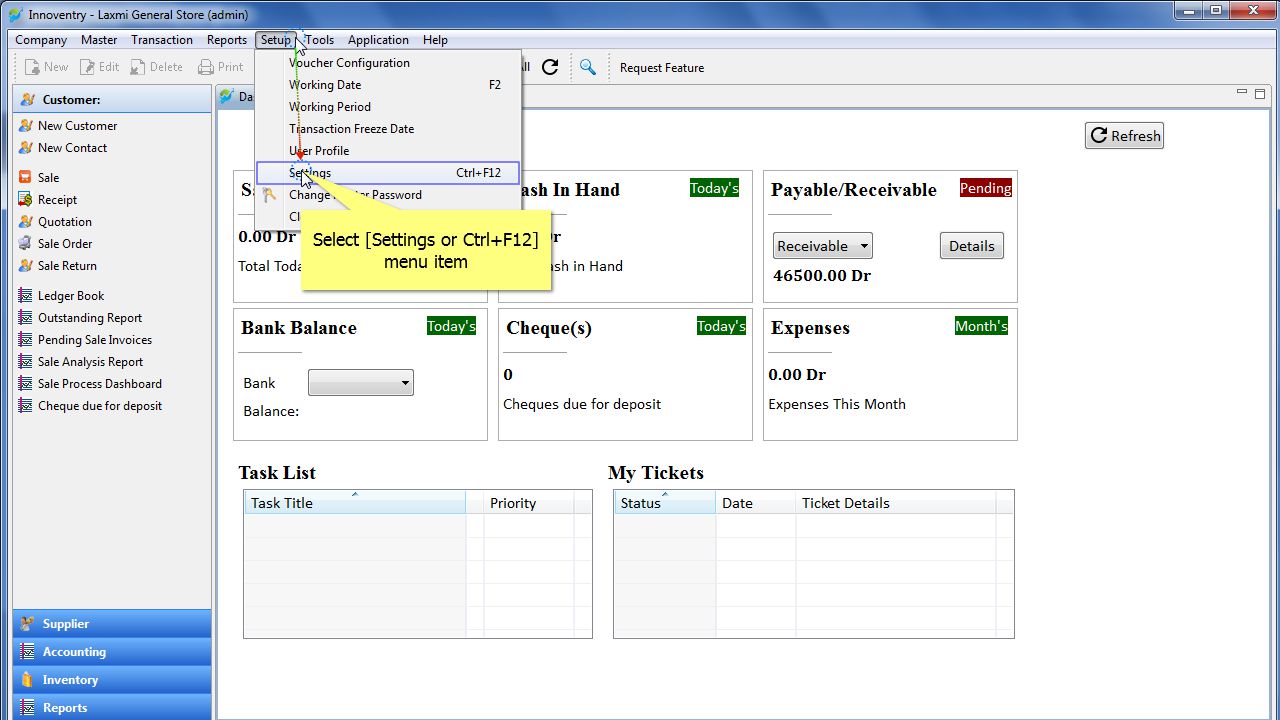
Step 5: Click on the “Setup” menu in the menu bar and select “Setting” option from the drop down list.
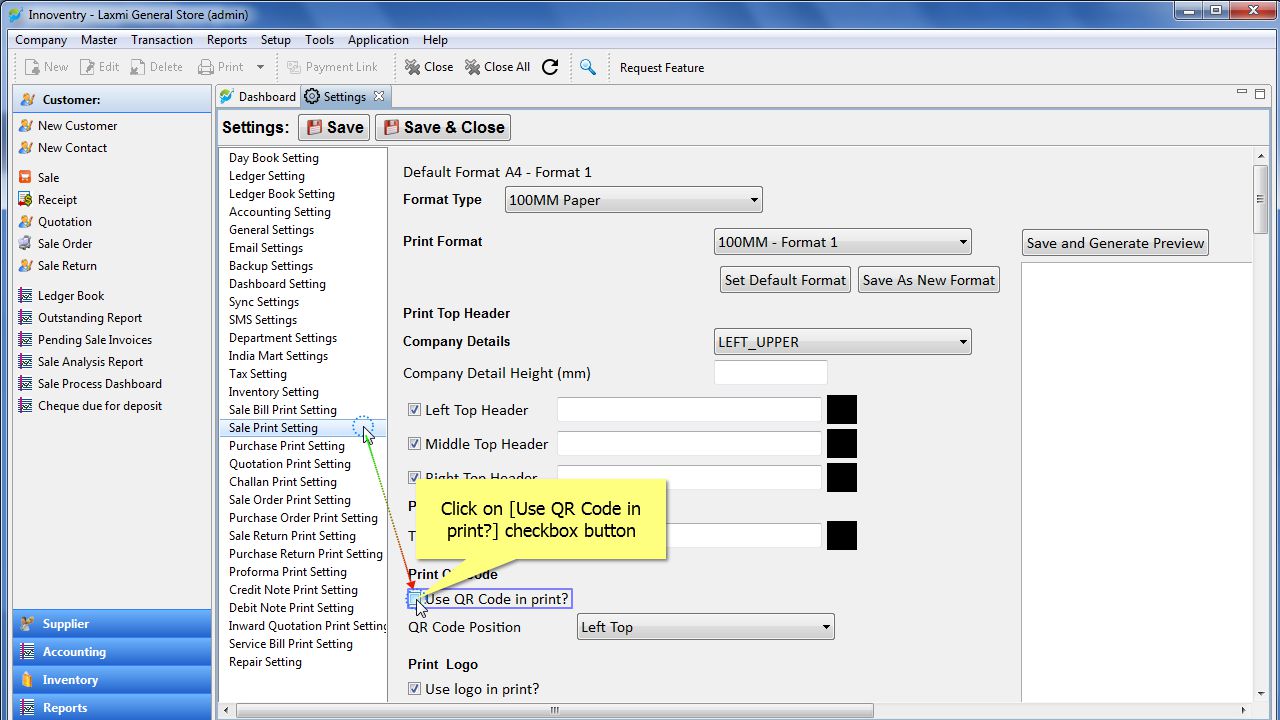
Step 6: Select the “Sale Print Setting” option from the outline items.

Step 7: Check the “Use QR Code in print” Checkbox.
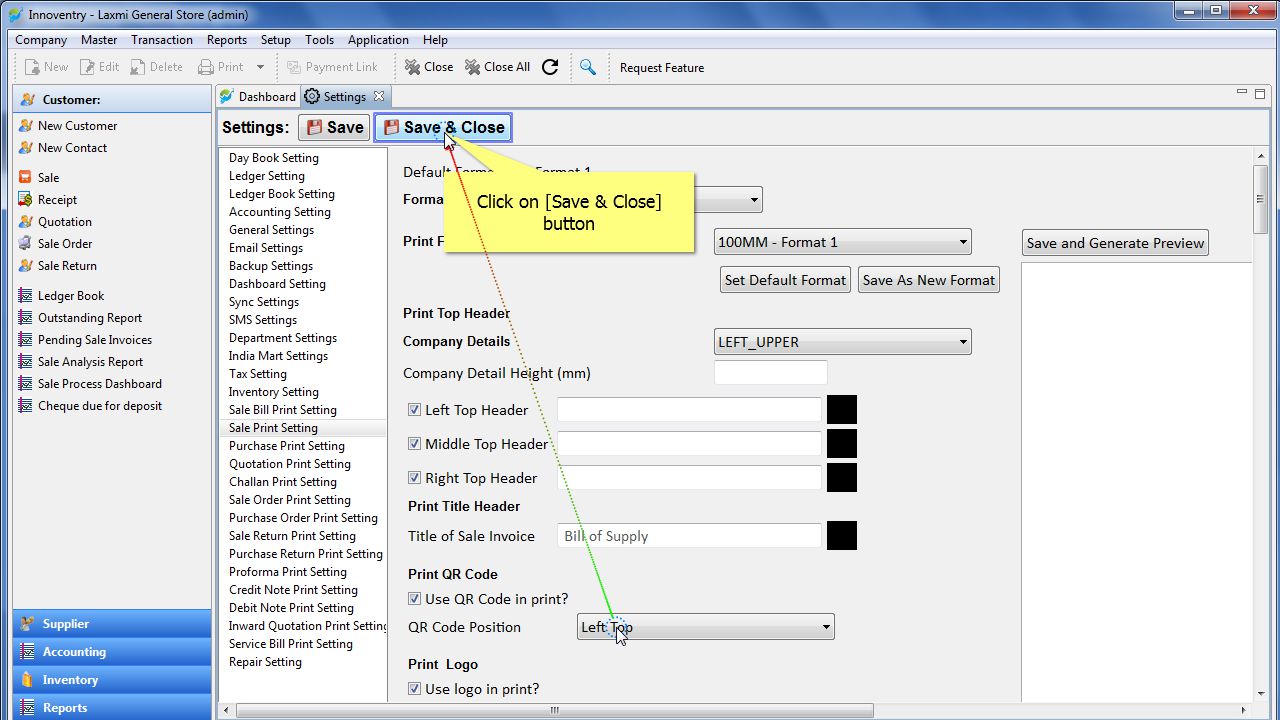
Step 8: Select the required position of the QR Code to be printed on the sales bill/invoice from the drop down list.

Step 9: Click on “Save & Close” button.
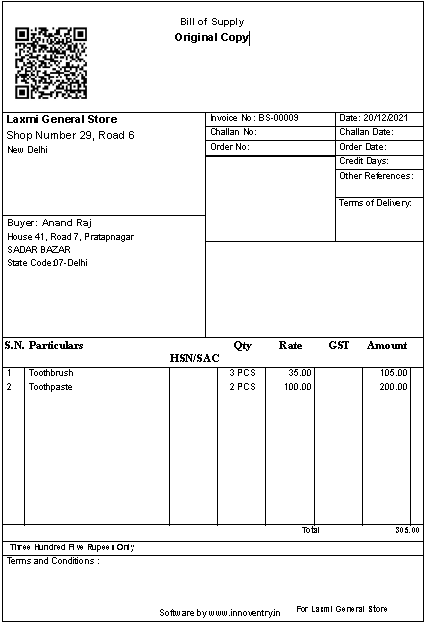
Step 10: Print an invoice as usual and you will find the QR Code printed on the sales invoice as shown in the image below of a sample invoice.