GSTIN or Goods and Services Tax Identification Number is a unique 15 digits alpha-numeric PAN-based code allotted to every registered person under Goods and Service Tax (GST). This GST number is provided to the GST taxpayer along with the GST registration certificate. The GST number also allows tracking a registered Taxpayer.
It serves as a factor of authenticity for the business. It’s verification can be done directly from the Innoventry Software. Not just that, we can also update the address and the name of the business/ledger in the software with a click.
>> Method 1: To verify GSTIN of the ledger follow the steps given #
Step 1: Make sure that the software is updated to it’s latest update roll-out.
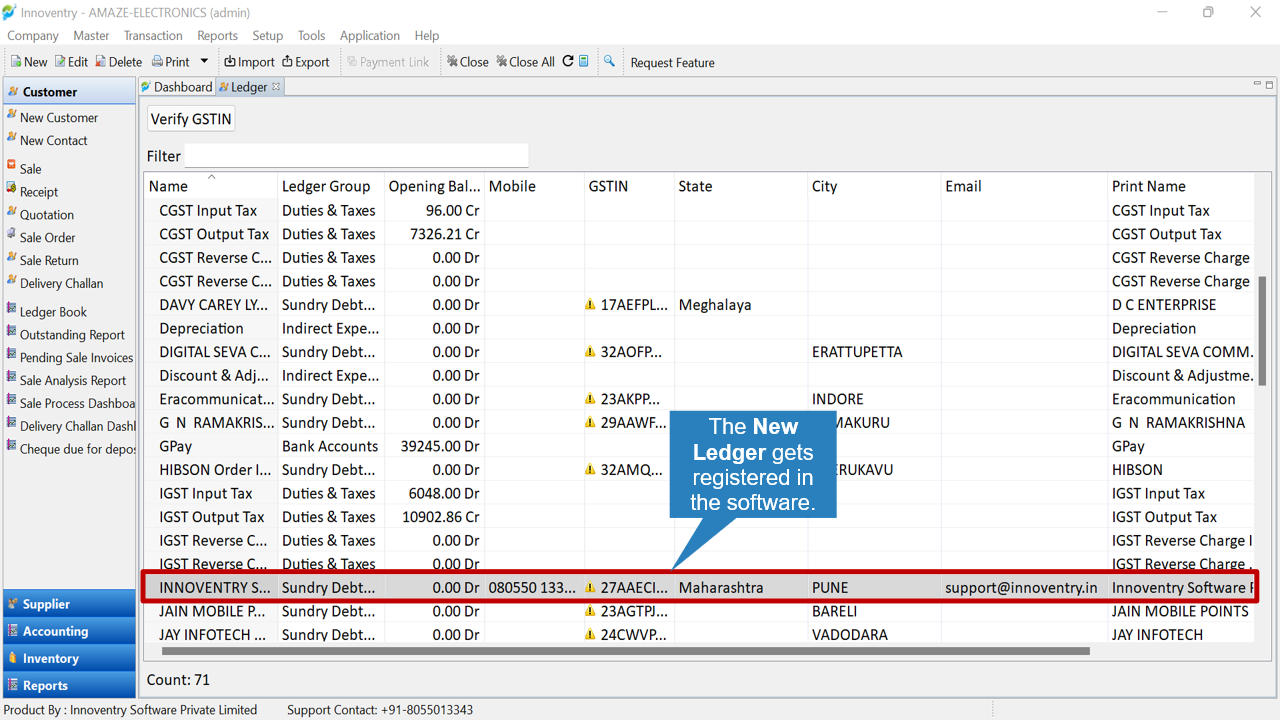
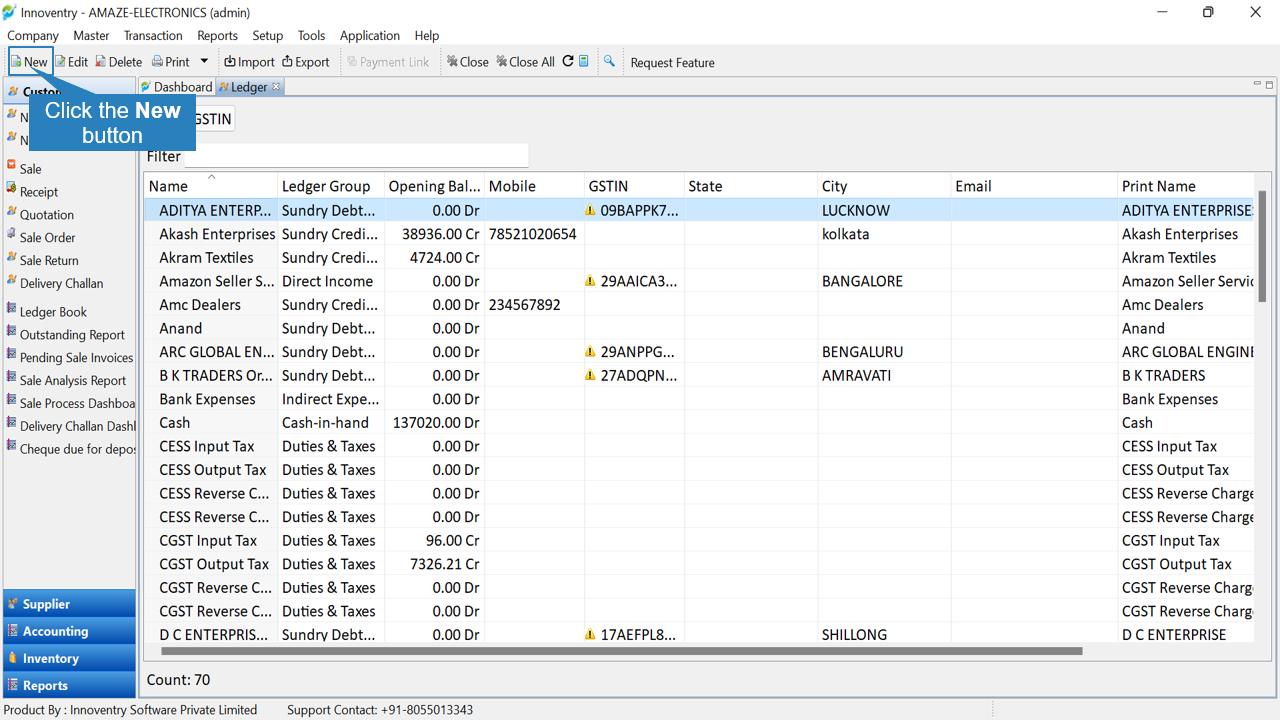
Step 2: Open the Ledger Dashboard by clicking on the Master>Ledger.

Step 3: The Ledger Dashboard opens up. Here we need to Select the Ledger for which the GSTIN is to be verified.

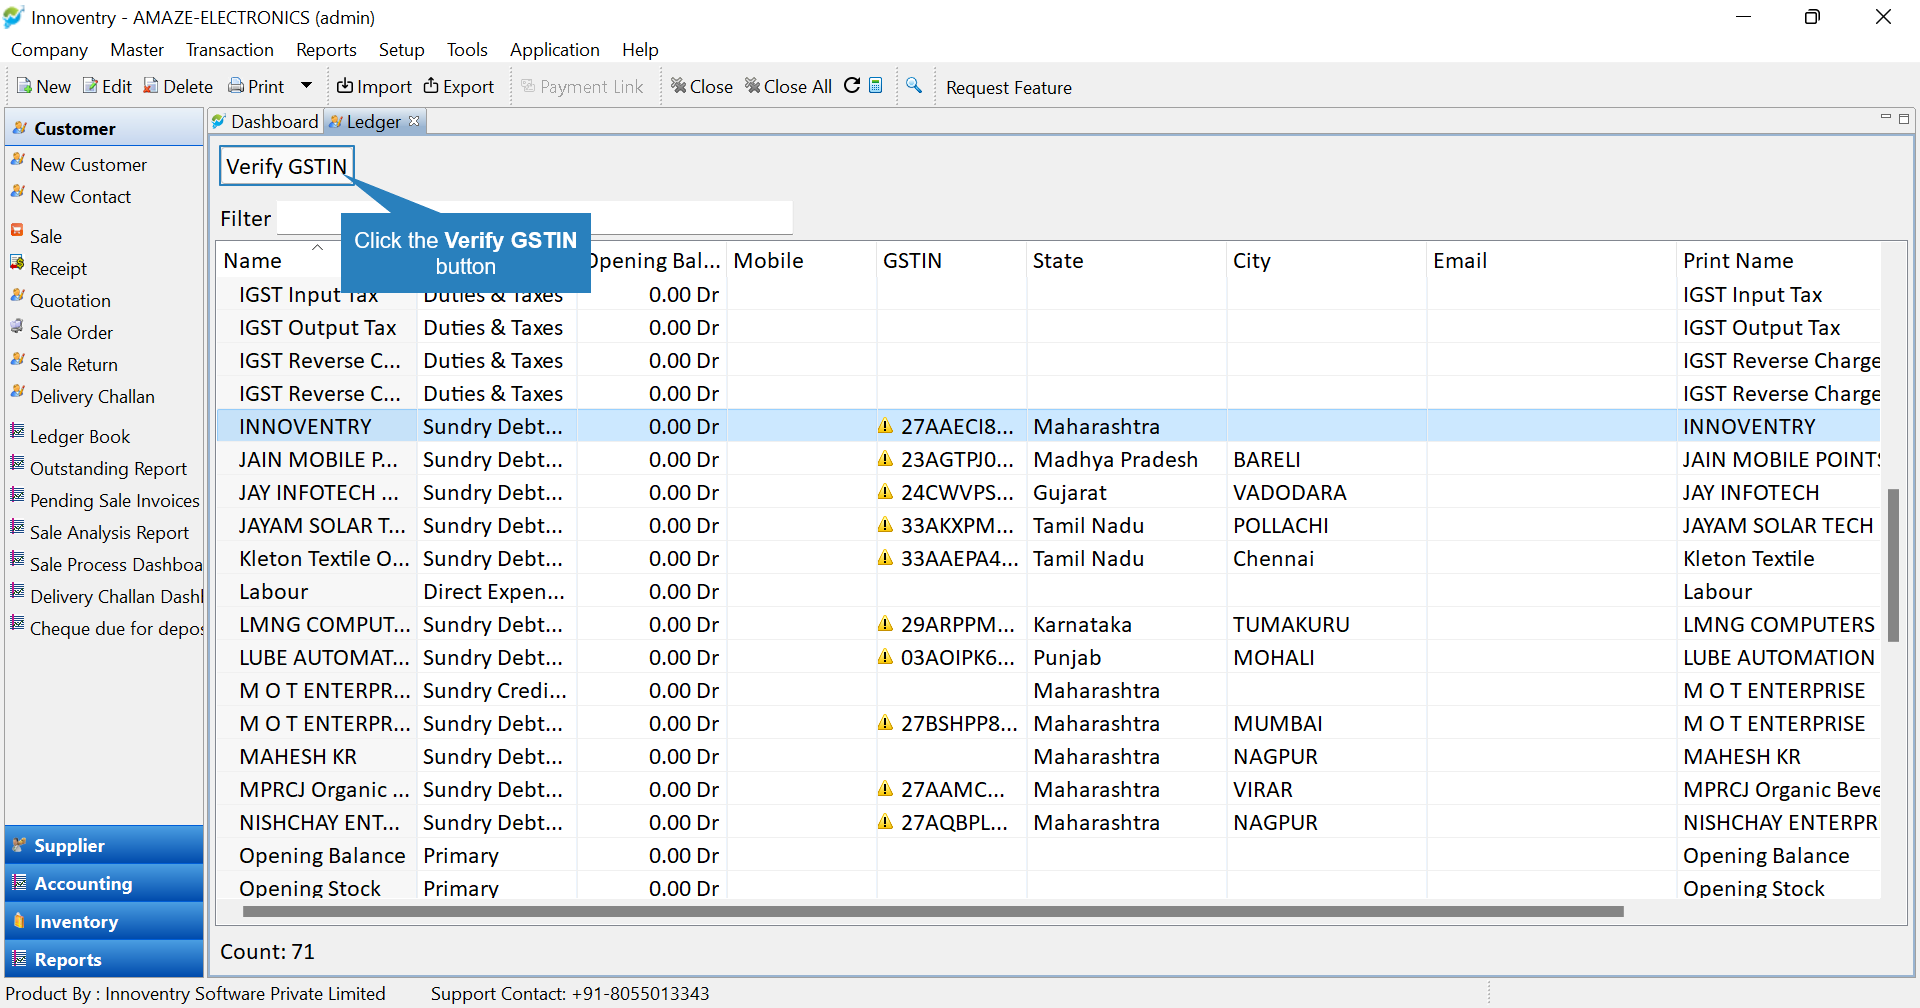
Step 4: Then click on the “Verify GSTIN” button.
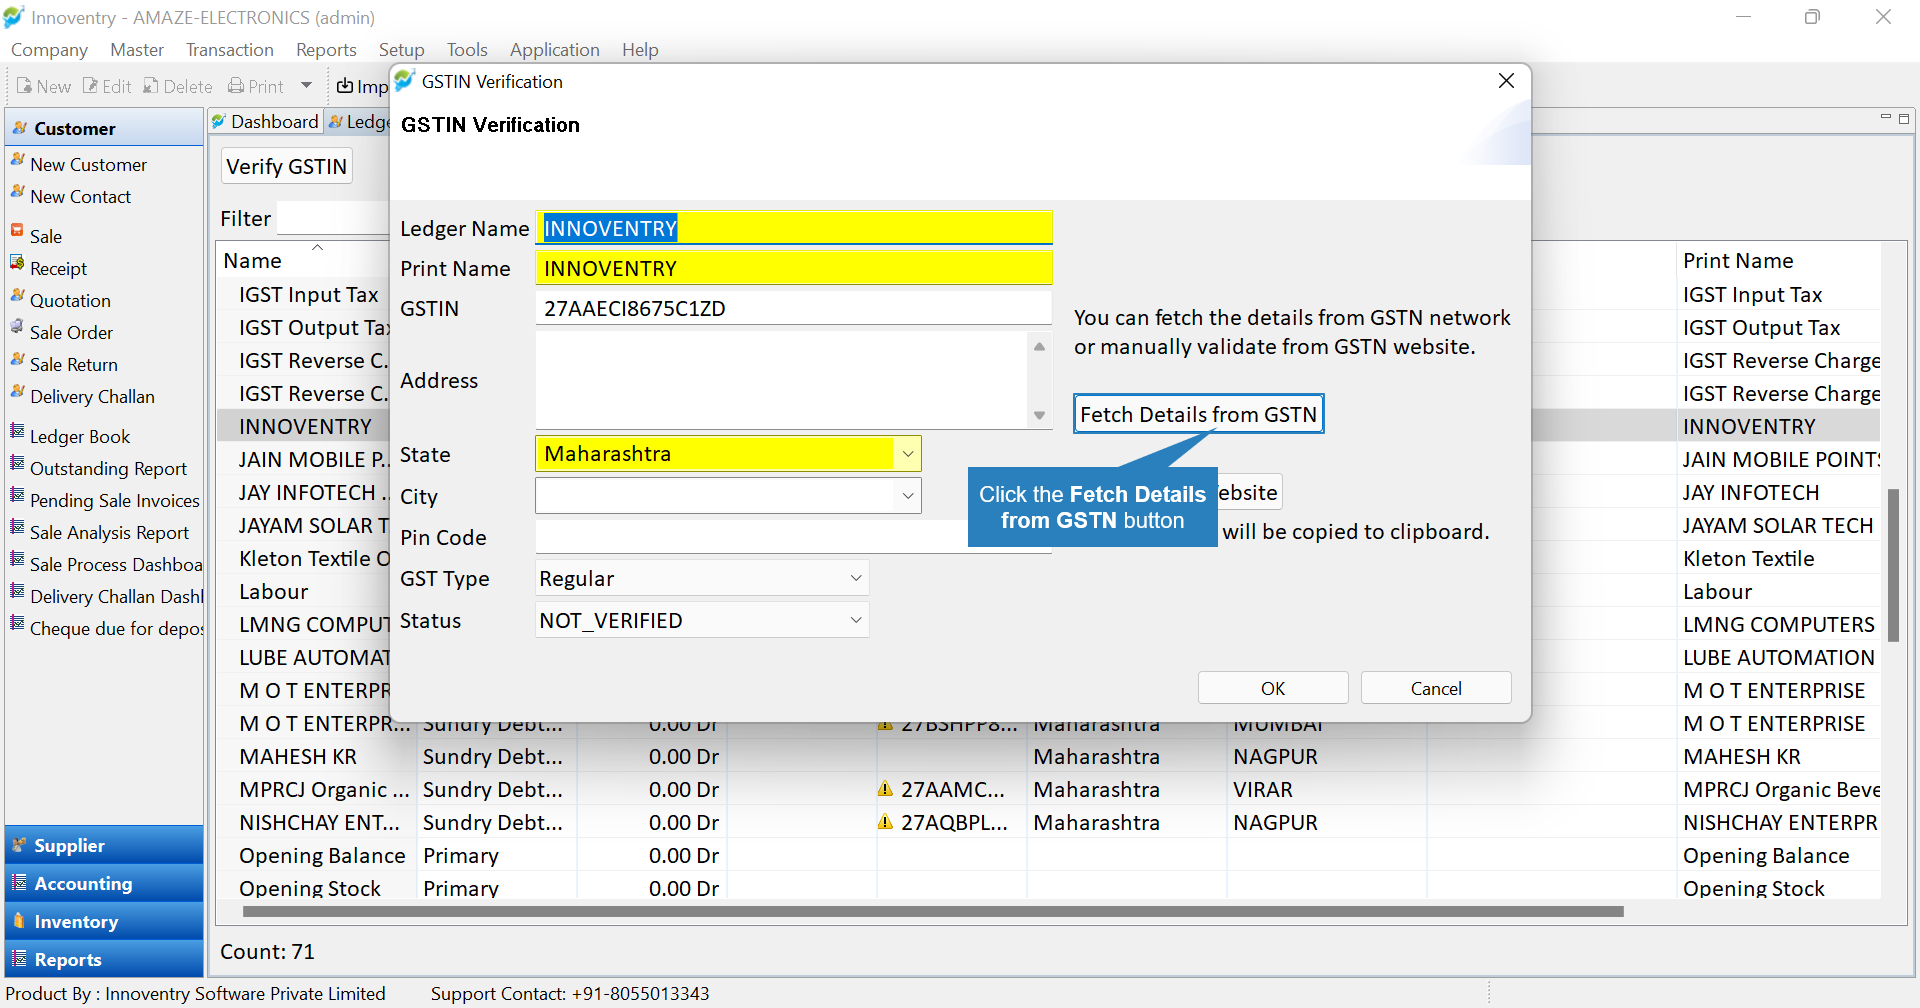
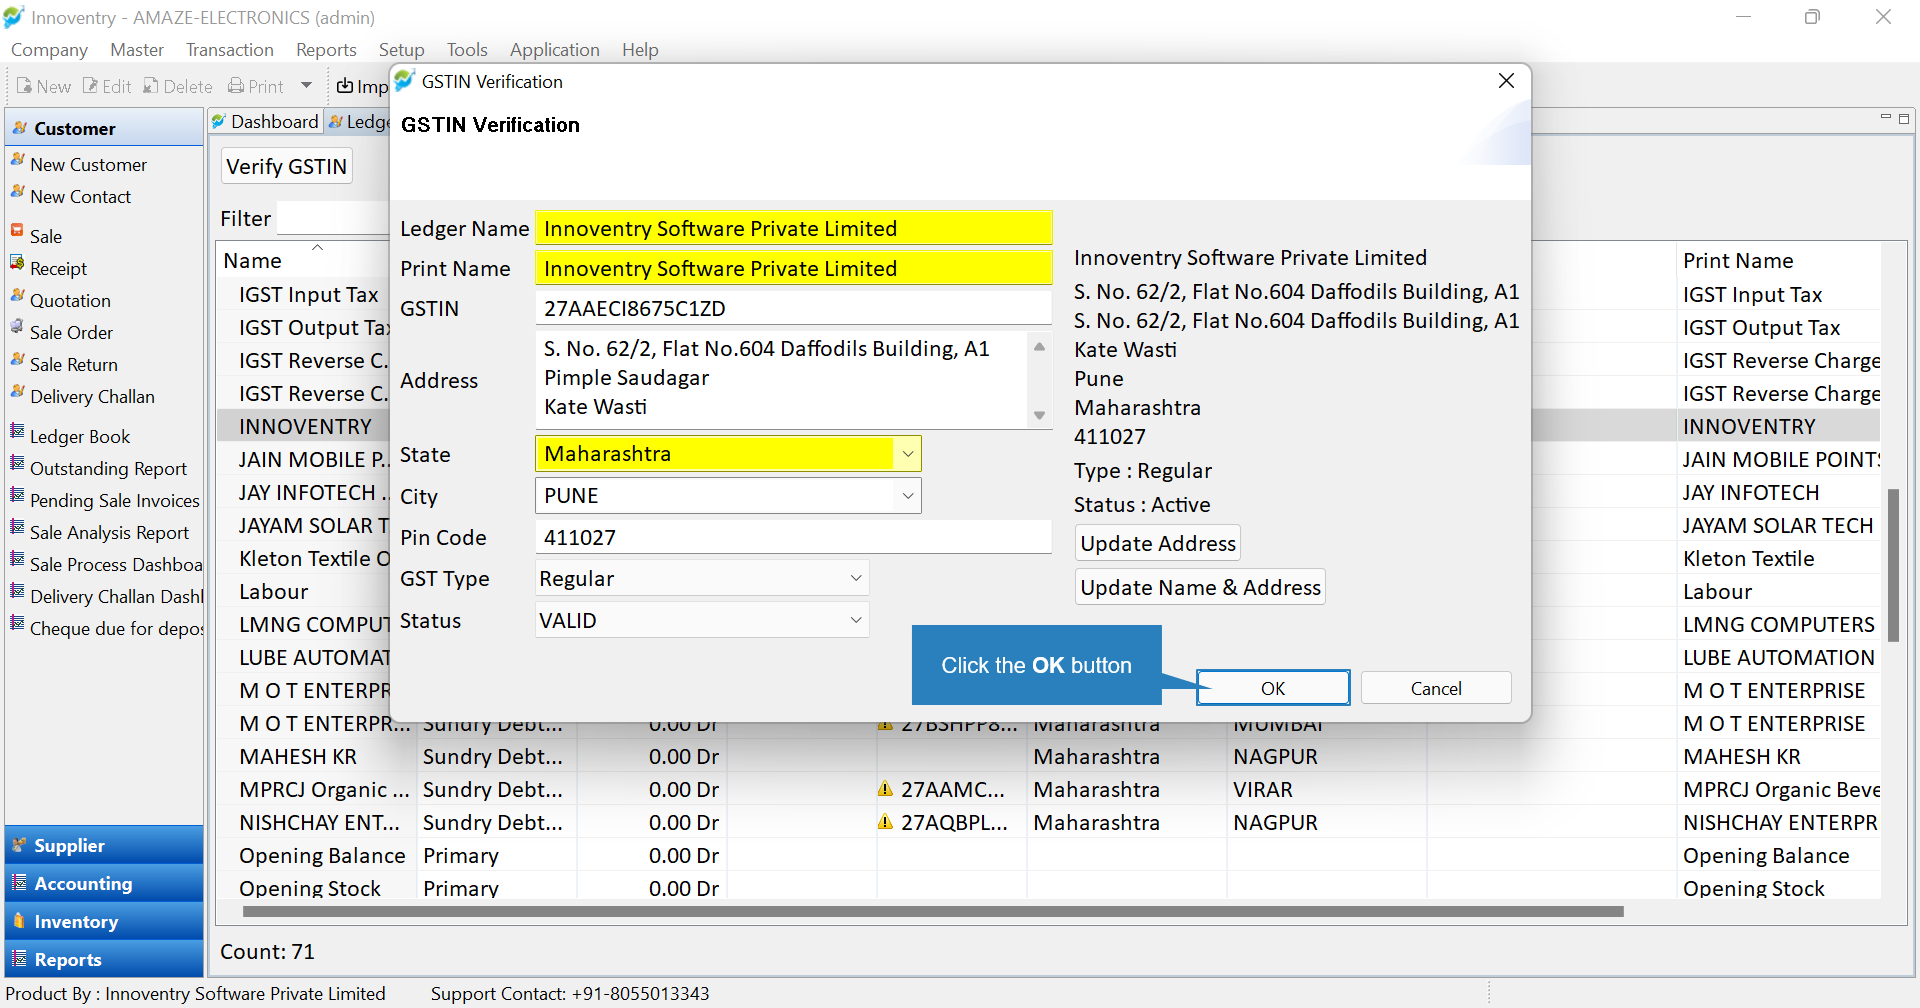
Step 5: After this the “GSTIN Verification” window opens. Here we have to click on the “Fetch Details from GSTIN“.
Step 6: The software will fetch the details automatically as can be seen from the below snap. The address, type of GST registration and also the Status of GSTIN weather it is “Valid”, ” In-Valid or “Not-Valid” is extracted. In case the user wants to update the address and the name of the ledger according to the data fetched. Click on the “Update Address” or “Update Name and Address” button accordingly.
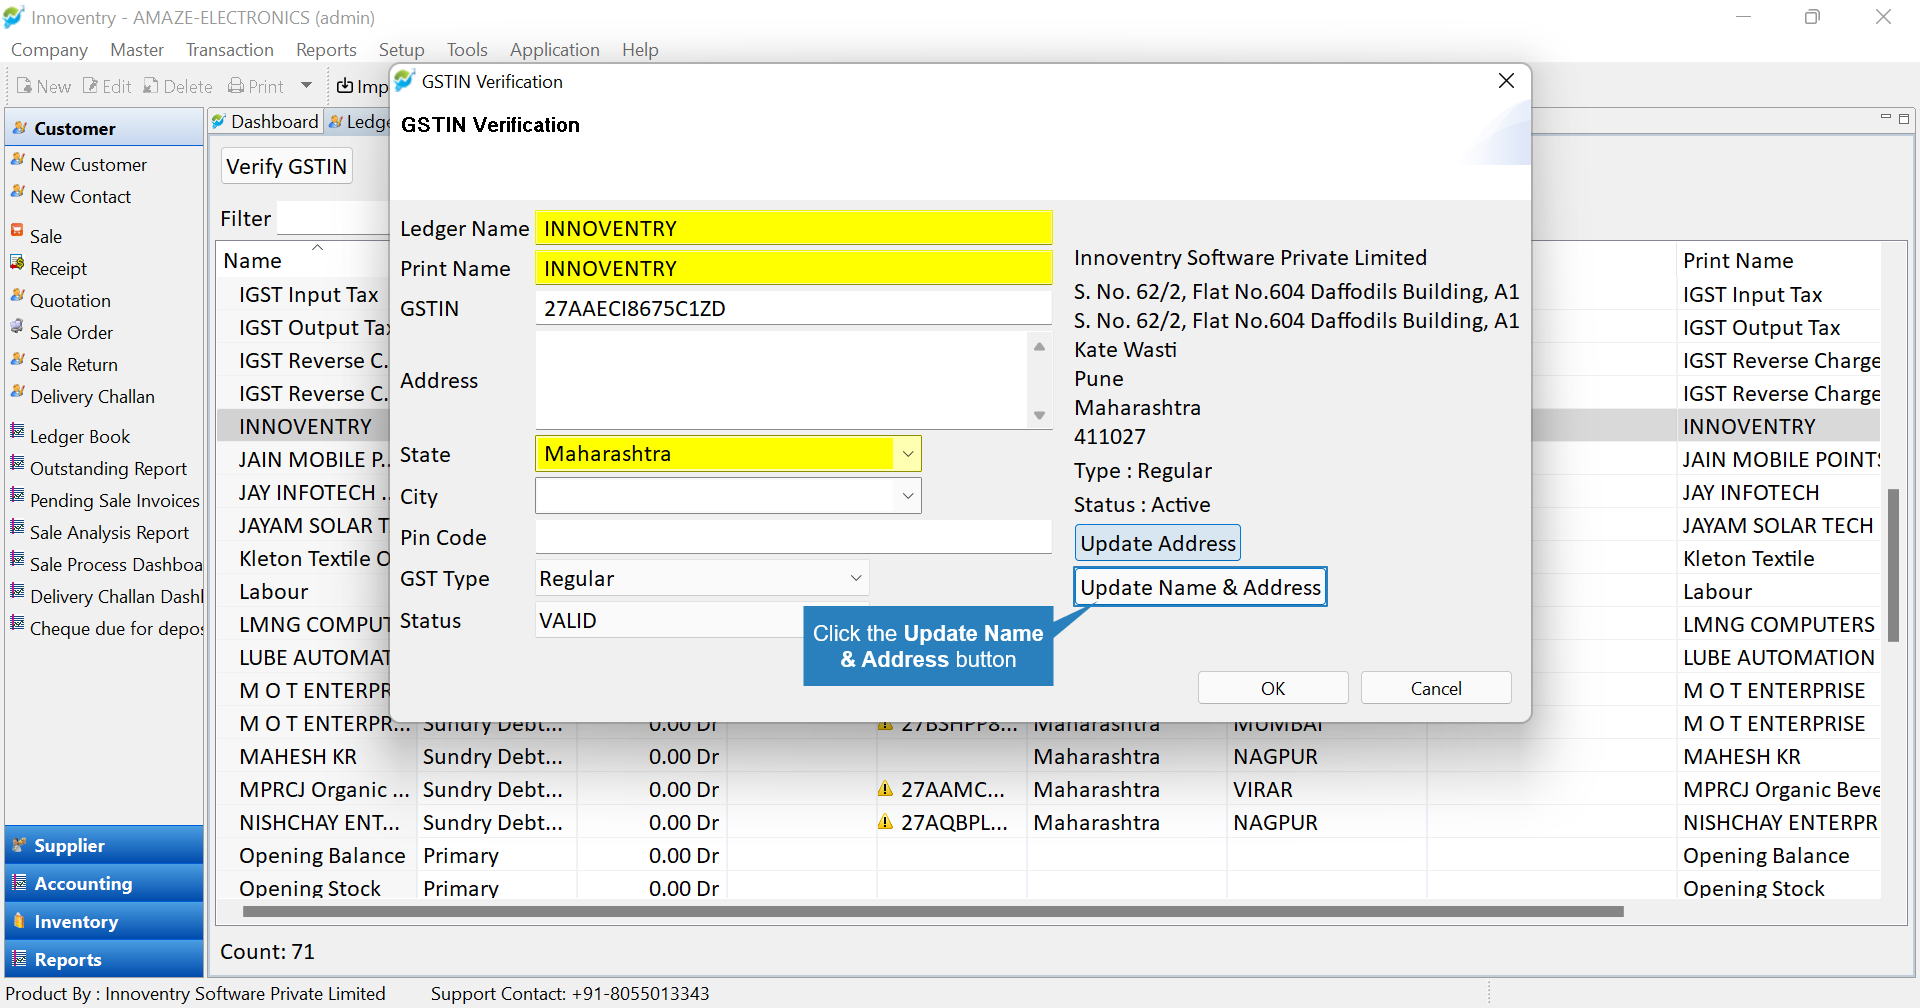
Step 7: The address and the name gets updated automatically as can be seen. Finally click on the “OK” button and the details will be updated.
>>Method 2: Used to import GSTIN Information during creation of ledger #
We can insert the ledger details such as the address and name of the ledger and verify GSTIN number during creation of a new ledger.
Step1: Click on Master>Ledger.

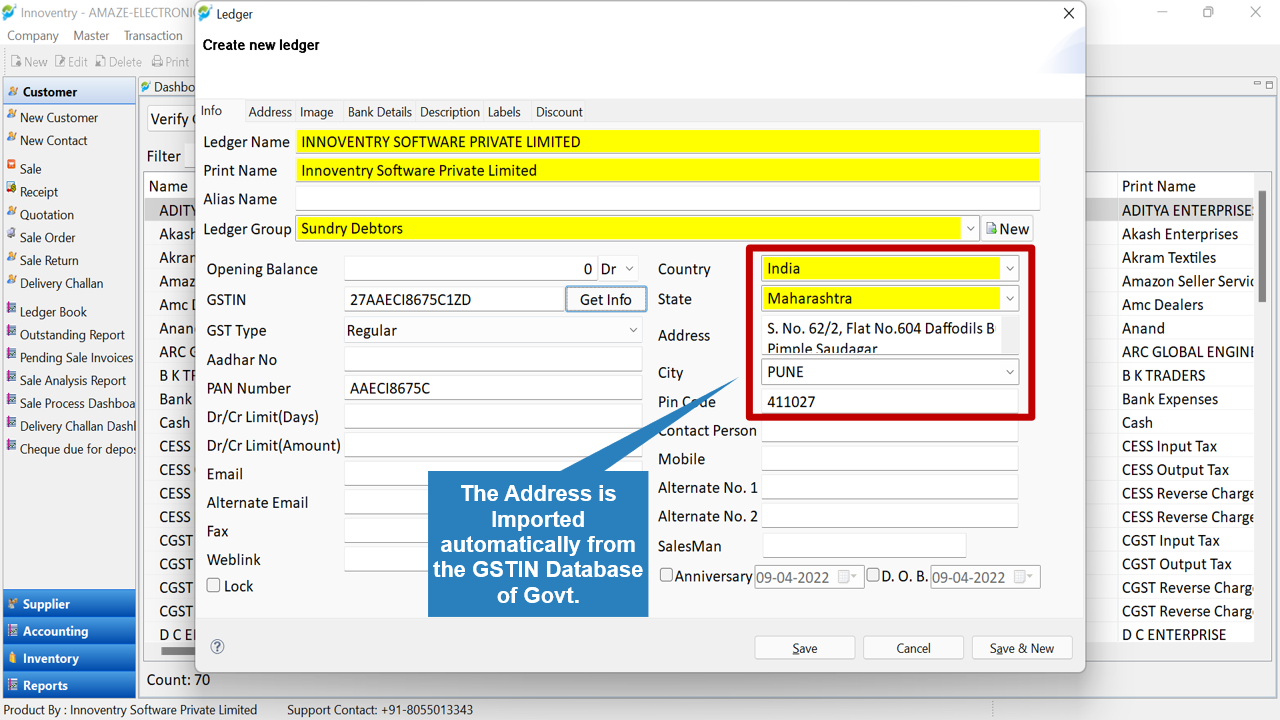
Step 2: Click on the “New” option in the Ledger dashboard.
Step 3: Type in the GSTIN and click on the “Get Info” button.

Step 4: The information such as “Name” and “Address” is automatically updated.
Step 5: Add other details as required and click on the “Save” button to save the ledger.
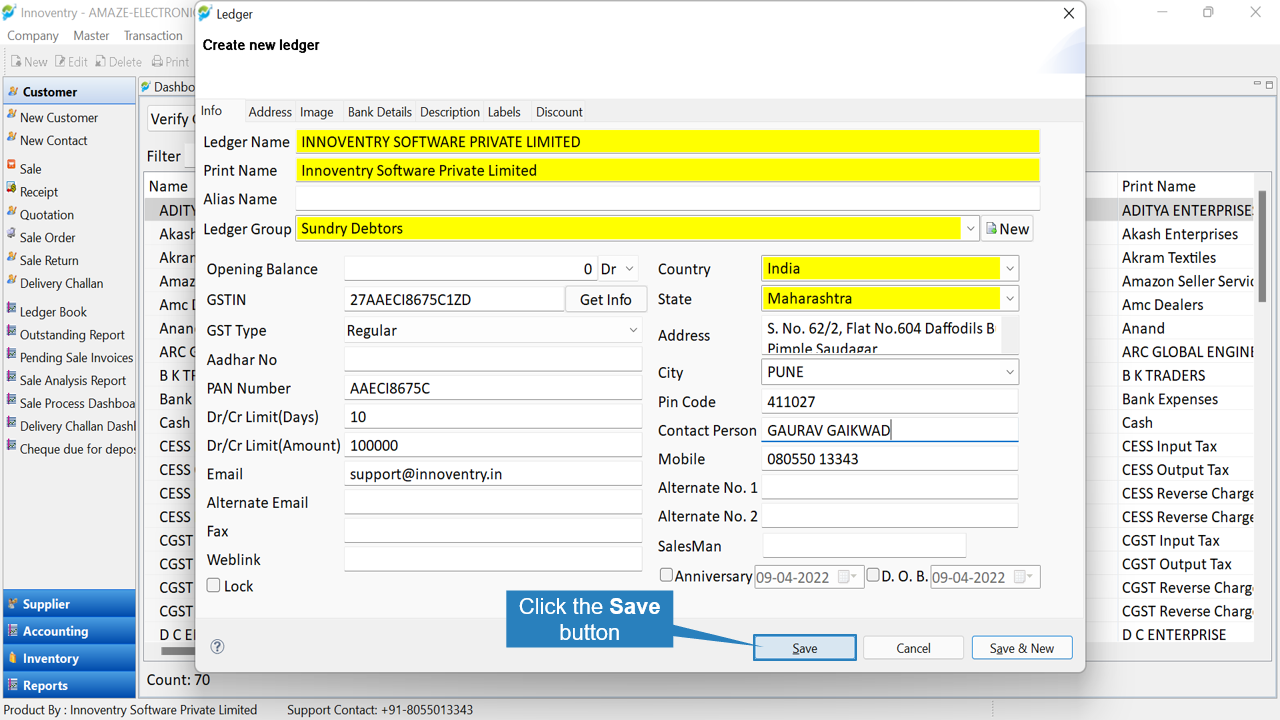
We can see in the below snap that the ledger is added to the software.